
Learn to Swim Better for Triathlon as a Beginner: From Single Lengths to an 800m Swim Set

Updated: Sep 5
For many beginner triathletes, the swim is the part of race day that creates the most stress. You may already be able to swim front crawl, but that does not always mean swimming feels smooth, relaxed, or sustainable. Maybe you can swim one length, maybe two, but then your breathing gets rushed, your legs sink, your shoulders tighten, and suddenly the pool feels a lot longer than it looked from the deck.
The good news is that better triathlon swimming is not about brute force. It is about building better body position, improving your stroke mechanics, learning to breathe calmly, and gradually extending your endurance one step at a time.
This article is written for the beginner triathlete swimmer who already has some ability to swim front crawl, but wants to go from swimming single lengths or short laps to building toward an 800m swim set with more confidence and control.
Triathlon swimming does not need to be scary. It just needs to be built in the right order.

What Makes Triathlon Swimming Different?
Triathlon swimming is different from pool racing because your job is not simply to get to the wall as fast as possible. Your job is to swim efficiently enough that you exit the water ready to bike and run.
That means the best beginner triathlon swim stroke is not necessarily the fastest stroke. It is the stroke you can repeat calmly, consistently, and safely. Before adding distance or speed, your first goal is to reduce drag, improve balance, control your breathing, and make each stroke feel easier.
A beginner triathlete does not need to swim like an Olympic swimmer. You need to swim well enough that you are not fighting the water, wasting energy, or arriving at T1 feeling like you already completed an entire race.
The goal is simple:
Swim calm.
Swim controlled.
Swim efficiently.
Then get on the bike ready to continue your race.
Understanding the Basics of Front Crawl
The front crawl stroke can feel complicated at first, but it becomes easier when you break it into smaller pieces. Every stroke includes body position, hand entry, catch, pull, push, arm recovery, and breathing.
For beginner triathletes, the most important thing is not mastering everything at once. It is learning one skill at a time, then slowly connecting those skills together until the stroke starts to feel smoother and more repeatable.
The Main Phases of the Stroke
Body Position
Body position is the foundation of the swim stroke. A good body position keeps you long, balanced, and close to the surface of the water. Your head should be relaxed, your eyes should look mostly down, and your hips and legs should not feel like they are dragging behind you.
Hand Entry
Your hand should enter the water in front of your shoulder, not across the centre line of your body. A clean hand entry helps set up the rest of the stroke.
Catch
The catch is where your hand and forearm begin to hold the water. This is the start of propulsion. You are not just pushing water down. You are trying to anchor your hand and forearm so your body can move forward.
Pull
The pull is where your body moves past your hand. This should feel strong but controlled. A good pull does not need to be aggressive, splashy, or rushed.
Push
The push finishes the stroke. This is where many beginner swimmers cut the stroke short. In a complete stroke, you should finish past the hip before the hand exits the water.
Arm Recovery
The arm recovery is the relaxed movement of the arm over the water as it returns to the front. This should feel loose and controlled, not tense or forced.
Breathing
Breathing is not separate from the stroke. It is part of the stroke. Beginner swimmers often hold their breath, lift their head, or rush the inhale. Better breathing comes from learning to exhale underwater and breathe with body rotation.
Step One: Body Position Comes First
Before worrying about speed, distance, or stroke power, beginner triathletes need to learn how to hold a better position in the water.
If your hips and legs are sinking, you are dragging yourself through the pool instead of moving through the water. This makes every length feel harder than it should. Good body position helps reduce drag, saves energy, and creates the foundation for every other part of the stroke.
This is also where breathing control begins. Before adding complicated swim sets, athletes need to become comfortable with their face in the water, exhaling calmly, and staying relaxed.
Body Position Drill 1: Kickboard Drill
The kickboard drill is a simple way to help beginner swimmers focus on body position, leg position, and comfort in the water.
How to Do It
Hold the kickboard lightly in front of you with your arms extended. Keep your head relaxed and your body long. Use a small, steady kick to move down the pool. The kick should come from the hips, not from bending aggressively at the knees.
You can start with your face out of the water if needed, but over time, try placing your face in the water and lifting or turning to breathe.
What It Should Feel Like
This should feel controlled and steady. You are not trying to kick as hard as possible. You are trying to feel your body stay long while your legs stay close to the surface.
Common Mistakes
Avoid pressing down hard on the kickboard. This can lift your upper body and cause your hips to drop. Also avoid a big bicycle-style kick. A smaller, relaxed kick is usually better for triathlon swimming.
Move On When
You can kick 25m with control, keep your body fairly long, and avoid feeling like your legs are sinking immediately.
Body Position Drill 2: Wall Push Torpedo Drill
The wall push torpedo drill teaches you what a long, streamlined body should feel like in the water.
How to Do It
Push off the wall with both arms extended overhead. Keep your head between your arms, look down, and make your body as long and narrow as possible. Glide forward like a torpedo.
At first, simply glide as far as you can while staying relaxed. As you improve, add a small flutter kick after the push-off.
What It Should Feel Like
You should feel long, narrow, and smooth. Your neck should stay relaxed and your head should not lift. This drill helps you feel how much easier swimming can be when the body is aligned.
Common Mistakes
Do not look forward. Looking forward usually causes the hips to drop. Do not rush into swimming right away. The goal is to feel the streamlined position first.
Move On When
You can push off, glide, and maintain a long body position without immediately sinking or lifting your head.
Body Position Drill 3: Superman Drill
The superman drill helps swimmers learn balance, body length, and relaxed face-down positioning.
How to Do It
Float face down with both arms extended in front of you, like Superman flying through the water. Use a gentle kick and keep your eyes looking down. Exhale slowly into the water.
You can do this for short sections, such as 5 to 10 seconds at a time, then stand up and reset.
What It Should Feel Like
This should feel calm and controlled. You should feel long from fingertips to toes. The goal is not to swim fast. The goal is to become comfortable holding a long body line.
Breathing Focus
Use this drill to practice slow bubbles into the water. The exhale should be steady and relaxed, not explosive or panicked.
Move On When
You can hold the superman position for 10 to 15 seconds, exhale underwater, and stay relaxed.
Body Position Drill 4: Side Kicks
Side kicks teach balance, rotation, and breathing position. This is an important step because front crawl is not swum perfectly flat. The body rotates from side to side with each stroke.
How to Do It
Kick on one side with your bottom arm extended in front of you. Your top arm rests along your side. Keep your body long and your head relaxed.
Aim to have one goggle in the water and one goggle slightly out of the water. This helps you learn the correct breathing position without lifting your whole head.
What It Should Feel Like
You should feel balanced on your side, not rolling onto your back or falling flat onto your stomach. Your kick should be small and steady.
Breathing Focus
This drill is a great place to practice side breathing. Turn just enough to get air, then return to a relaxed position.
Move On When
You can hold your side position, breathe without lifting your head too much, and keep your body from collapsing.
Body Position Drill 5: 6-1-6 Drill
The 6-1-6 drill connects side balance, rotation, and swimming rhythm.
How to Do It
Start kicking on one side for six kicks. Take one freestyle stroke to rotate to the other side. Then kick for six kicks on the other side. Repeat this pattern down the pool.
The pattern is:
6 kicks — 1 stroke — 6 kicks
What It Should Feel Like
This should feel smooth and controlled. You are learning how the body rotates from one side to the other. The single stroke should not be rushed.
Breathing Focus
Breathe while you are balanced on your side. Try not to lift your head forward. Rotate, breathe, and return to control.
Move On When
You can rotate from side to side without feeling like you are fighting the water, and you can breathe calmly during the drill.
Breathing Drills to Use During Body Position Work
Breathing control should be introduced early. It should not be saved for later because breathing affects everything: body position, rhythm, confidence, and endurance.
Bubble Drill
Hold the wall or stand in shallow water. Put your face in the water and slowly exhale through your nose or mouth. Lift or turn your head to inhale. Repeat several times.
The goal is to become comfortable exhaling underwater instead of holding your breath.
Sink Down Drill
Take a breath, place your face in the water, and slowly exhale until your body begins to sink. Stand up, reset, and repeat.
This teaches calm exhale control and helps reduce panic in the water.
Side Breathing Drill
Use side kicking to practice breathing with rotation. Keep one goggle in the water, breathe calmly, and avoid lifting your head forward.
This teaches the athlete that breathing should be part of the body roll, not a separate head-lifting movement.
When to Move Beyond Body Position Drills
You are ready to move to the next stage when you can:
Swim or drill 4 to 6 lengths with better balance.
Keep your head relaxed and looking mostly down.
Exhale underwater without panic.
Avoid frantic kicking.
Breathe during side kicking without lifting your whole head.
Feel less drag through the water.
You do not need to be perfect before moving on. You just need enough control that your body position is no longer falling apart every length.
Step Two: Catch, Pull, and Push
Once your body position improves, the next step is learning how to move yourself forward more efficiently.
Many beginner swimmers slip through the water during the catch, pull too wide, pull too deep, or cross over the centre line of the body. The goal is to feel like your hand and forearm are holding water so your body can move past that point.
This is where swimming starts to feel less like survival and more like forward motion.
Catch, Pull, and Push Drill 1: Single Arm Freestyle
Single arm freestyle allows you to isolate one side of the stroke at a time.
How to Do It
Swim using one arm while the other arm stays extended in front of you. Focus on a smooth catch, pull, and push. Switch arms each length or halfway down the pool.
Keep the movement slow and controlled.
This is not a sprint drill.
What It Should Feel Like
You should feel the working arm enter the water, catch, pull, and finish past the hip. Your body should rotate slightly with the stroke.
Breathing Focus
This is a good place to practice breathing rhythm. Breathe to the side of the working arm if that feels natural, or use the drill to improve comfort breathing to both sides.
Move On When
You can complete the drill without crossing over the centre line, rushing the pull, or losing body position.
Catch, Pull, and Push Drill 2: Catch-Up Drill
Catch-up drill helps improve timing, body length, and patience at the front of the stroke.
How to Do It
Start with both arms extended in front of you. Take one full stroke with one arm. Let that hand return to the front before the other arm begins its stroke. Alternate arms down the pool.
Think of one hand “catching up” to the other before the next stroke starts.
What It Should Feel Like
This should feel long and patient. It may feel slower than your normal swimming, and that is okay. The goal is to reduce rushing and improve control.
Breathing Focus
Use this drill to practice calm breathing. Because the stroke is slower, you have more time to focus on exhaling underwater and turning smoothly to inhale.
Move On When
You can stay balanced between strokes, avoid rushing, and keep the stroke long.
Catch, Pull, and Push Drill 3: Fist Drill
Fist drill teaches swimmers to use the forearm, not just the hand.
How to Do It
Swim freestyle with your hands closed in fists. Focus on pressing water with your forearm. After 25m, open your hands and swim normally so you can feel the difference.
A simple set could be:
25m fist drill + 25m regular freestyle
What It Should Feel Like
This will feel awkward at first. That is normal. Without the open hand, you are forced to become more aware of your forearm and the pressure you create against the water.
When you open your hands again, the water should feel stronger and more noticeable.
Breathing Focus
Stay relaxed. Do not let the awkwardness of the drill cause you to hold your breath. Keep the exhale steady underwater.
Move On When
You can swim fist drill without feeling completely disconnected and you notice a better feel for the water when returning to normal freestyle.
Catch, Pull, and Push Drill 4: Finish the Stroke Drill
Many beginner swimmers cut the stroke short. This means they miss the final push phase of the stroke and lose forward movement.
The finish the stroke drill teaches you to complete the stroke before recovering the arm over the water.
How to Do It
Swim slowly and focus on pushing the water all the way past your hip. Before your hand exits the water, you should feel your thumb rub just below your hip on your thigh.
Think:
Thumb to thigh before recovery.
This cue helps ensure you are finishing the stroke instead of pulling your hand out too early.
What It Should Feel Like
You should feel a stronger finish at the back of the stroke. The stroke may feel longer and more complete. You should not feel like you are chopping the water or rushing the recovery.
Common Mistakes
Avoid forcing the arm too far back or twisting the shoulder awkwardly. The cue is controlled and smooth: thumb brushes below the hip on the thigh, then the arm exits into recovery.
Move On When
You can consistently finish the stroke near the hip without shortening it when tired.
Breathing Drills to Use During Catch, Pull, and Push Work
As the stroke becomes more coordinated, breathing should continue to be included.
3-3-3 Breathing Drill
Swim three strokes breathing to one side, then three strokes breathing to the other side. Repeat this pattern.
This helps develop breathing awareness on both sides and teaches the swimmer to stay relaxed when changing breathing sides.
Breathing Every 5 or 7 Strokes
This drill should be used carefully and calmly. The goal is not to deprive yourself of air. The goal is to improve exhale control, relaxation, and comfort between breaths.
Try short repeats such as:
4 x 25m breathing every 5 strokes
As you improve, you may try breathing every 7 strokes for short sections.
This is not meant to be your normal race-day breathing pattern. It is a control drill.
When to Move Beyond Catch, Pull, and Push Drills
You are ready to move forward when you can:
Swim 6 to 8 lengths with a smoother stroke.
Feel pressure on the water during the pull.
Avoid crossing over the centre line.
Finish the stroke past the hip.
Feel your thumb brush below your hip on your thigh during finish-the-stroke work.
Maintain calm breathing during easy drills.
Swim with less splashing and more control.
Again, you do not need perfection. You are looking for progress and repeatability.
Step Three: Arm Recovery
Once the catch, pull, and push improve, the next step is cleaning up the arm recovery.
The recovery is the part of the stroke where the arm travels above the water and returns to the front. For beginner swimmers, this often becomes tense, rushed, or wide. A relaxed recovery helps protect the shoulders, improves stroke rhythm, and sets up a better hand entry for the next stroke.
A good recovery does not need to be dramatic. It should feel relaxed, smooth, and repeatable.
Arm Recovery Drill 1: Finger Drag Drill
Finger drag is one of the best beginner-friendly drills for developing a relaxed arm recovery.
How to Do It
Swim freestyle while lightly dragging your fingertips across the surface of the water during recovery. Keep your elbow relaxed and allow the hand to move forward smoothly.
The fingertips should skim the water. Do not force the movement.
What It Should Feel Like
This should feel smooth and controlled. The shoulder should feel relaxed, not jammed or tense.
Breathing Focus
Keep breathing calm and natural. This drill pairs well with bilateral breathing or 3-3-3 breathing because the slower recovery gives you time to focus on rhythm.
Move On When
Your recovery feels less tense, your hand enters in front of the shoulder, and you are not swinging the arm wide.
Arm Recovery Drill 2: Zipper Drill
The zipper drill helps swimmers understand a compact, relaxed recovery.
How to Do It
During the arm recovery, imagine you are zipping up the side of your body with your thumb. The hand travels up the side of the body before returning to the front.
Keep the movement slow and relaxed.
What It Should Feel Like
This should feel compact and controlled. The elbow leads the recovery while the hand stays relaxed.
Common Mistakes
Do not force the shoulder into an uncomfortable position. If the shoulder feels pinched, reduce the range of motion and keep the drill gentle.
Move On When
Your recovery is no longer overly wide, your hand enters the water more cleanly, and your shoulders stay relaxed.
Breathing Drills to Use During Arm Recovery Work
During recovery drills, continue using controlled breathing patterns.
Good options include:
3-3-3 breathing drill.
Breathing every 5 strokes for short sections.
Breathing every 7 strokes for advanced control over very short sections.
Easy bilateral breathing practice.
The key is to keep breathing relaxed. If you feel panicked, return to easier breathing and rebuild control.
When to Move Beyond Arm Recovery Drills
You are ready to move forward when you can:
Swim with relaxed shoulders.
Keep hand entry in front of the shoulder.
Avoid swinging the arm wide.
Maintain rhythm without rushing.
Breathe without lifting the head forward.
Swim 100m broken into smaller segments with good form.
Example:
4 x 25m freestyle with 15 to 30 seconds rest
or
2 x 50m freestyle with easy rest
Building Swim Endurance Toward 800m
Once your body position, stroke mechanics, recovery, and breathing are improving, it is time to start building endurance.
This does not mean jumping straight into long continuous swims. For beginner triathletes, the best approach is to use short repeats with rest. Rest is not failure. Rest is a tool.
Rest allows you to maintain better form while gradually increasing total distance. Over time, the rests become shorter, the repeats become longer, and swimming starts to feel more sustainable.
The goal is not to survive one ugly 800m swim. The goal is to build the ability to swim 800m with control.
Stage 1: Single-Length Confidence
Goal: Swim 25m with control.
Example set:
8 x 25m easy freestyle
Rest 20 to 40 seconds between lengths.
Focus on:
Relaxed body position.
Controlled breathing.
Smooth strokes.
Not sprinting the first 10m.
Finishing each length with form.
Move on when:
You can complete all 8 lengths.
Your breathing stays controlled.
Your stroke does not completely fall apart in the final few lengths.
Stage 2: Linking Lengths Together
Goal: Swim 50m repeats.
Example set:
6 x 50m easy freestyle
Rest 30 to 45 seconds between repeats.
Total: 300m
Focus on:
Making the second length feel similar to the first.
Avoiding panic after the turn.
Staying long when tired.
Keeping the exhale steady.
Move on when:
You can swim each 50m without panic.
Your second length does not feel like survival.
You do not need excessive rest to continue.
Stage 3: Building Repeatability
Goal: Swim 100m repeats.
Example set:
4 x 100m easy freestyle
Rest 45 to 60 seconds between repeats.
Total: 400m
Focus on:
Smooth pacing.
Relaxed breathing.
Consistent form.
Not turning the first 25m into a race.
Move on when:
You can complete all 4 repeats.
Your form stays mostly consistent.
You feel tired but not wrecked.
Stage 4: Extending the Set
Goal: Build toward 600m total.
Example set:
3 x 200m easy freestyle
Rest 60 seconds between repeats.
Total: 600m
Focus on:
Staying calm through the middle of the repeat.
Finishing the stroke when tired.
Keeping the kick relaxed.
Avoiding tension in the shoulders.
Move on when:
You can hold relaxed breathing.
Your stroke stays smooth through the final 50m.
You finish feeling like you could do a little more.
Stage 5: The 800m Beginner Triathlon Swim Set
Goal: Complete an 800m structured swim set.
Beginner option:
8 x 100m easy freestyle
Rest 30 to 45 seconds between repeats.
Total: 800m
Intermediate beginner option:
4 x 200m easy freestyle
Rest 45 to 60 seconds between repeats.
Total: 800m
More advanced beginner option:
2 x 400m easy freestyle
Rest 60 to 90 seconds between repeats.
Total: 800m
Move on when:
You can complete 800m without your form collapsing.
Breathing remains controlled.
You recover well after the session.
You feel ready to slowly reduce rest or increase continuous swimming.
The important thing is not which version you choose. The important thing is that the swim is controlled, repeatable, and appropriate for your current ability.
Adding Speed After Technique Is Stable
Speed work has a place in beginner triathlon swim training, but it should come after the basics are in place.
If you add speed before you can control your body position, stroke, and breathing, you will usually just practice swimming badly at a faster effort. Once your technique is more stable, short speed drills can help improve confidence, stroke rhythm, and comfort at different efforts.
The goal is not all-out sprinting. The goal is learning how to change pace without falling apart.
Speed Drill 1: Fast 12.5m / Easy 12.5m
This is a simple way to introduce faster swimming without asking the athlete to hold speed for too long.
How to Do It
Swim the first half of the length faster, then swim the second half easy.
For a 25m pool:
12.5m fast / 12.5m easy
Focus on staying smooth during the faster section. Do not thrash. Do not hold your breath. Do not let the stroke fall apart.
Progression Options
As the athlete improves, this can progress to:
25m fast / 25m easy
Then:
50m fast / 50m easy
Then:
100m strong / 100m easy
This progression should happen gradually. The athlete should only move to the next version when they can hold good form and controlled breathing.
Move On When
You can change speeds smoothly, stay relaxed during the faster section, and recover during the easy section.
Speed Drill 2: Strong Finish 50s
This drill teaches athletes to finish a swim repeat with control rather than fading badly.
How to Do It
Swim 50m. The first 25m is easy. The second 25m is slightly stronger.
Example:
6 x 50m strong finish
Rest 30 to 60 seconds between repeats.
What It Should Feel Like
The second 25m should feel stronger, but not frantic. Your stroke should stay long and your breathing should stay controlled.
Move On When
You can finish faster without fighting the water, maintain good body position, and recover within 30 to 60 seconds.
Open Water Swimming for Beginner Triathletes
Being able to swim 800m in the pool is a major step, but open water swimming adds a new layer of challenge.
There are no walls to push off, no lane ropes to guide you, and no black line on the bottom of the lake. You may deal with waves, colder water, other swimmers, limited visibility, and race-day nerves.
That is why beginner triathletes should practice open water swimming before race day whenever possible.
Pool fitness is important, but pool fitness and open water confidence are not exactly the same thing.

Open Water Skill 1: Sighting
In open water, you need to look where you are going.
Sighting is the skill of briefly lifting your eyes forward to find a buoy, landmark, or swim exit without disrupting your stroke too much.
How to Practice
Every 6 to 10 strokes, lift your eyes forward briefly, then return your face to the water. Try not to lift your whole head high.
Think:
Peek, don’t pop.
You are looking forward just enough to see, not lifting your entire upper body out of the water.
Open Water Skill 2: Swimming Without Walls
In the pool, you get a small break every time you touch the wall. In open water, there are no walls.
To prepare for this, practice longer intervals in the pool and avoid relying on a huge push-off every length. You can also practice open turns or gentle wall touches instead of powerful push-offs.
This helps make pool swimming feel a little more like open water swimming.
Open Water Skill 3: Wetsuit Practice
A wetsuit can help with buoyancy, but it also changes how swimming feels.
Your hips and legs may sit higher. Your shoulders may feel different. Your breathing may feel restricted if the suit is too tight or if you are not used to it.
Do not wait until race day to try your wetsuit.
Practice in it before your event so you understand how it feels and how your stroke changes.
Open Water Skill 4: Swimming Near Other People
Triathlon swims can involve contact. Someone may touch your feet. You may bump arms. You may swim close to another athlete.
This can feel stressful if you have never experienced it before.
Practice swimming beside a partner in a controlled environment. Learn how to stay calm, reset your breathing, and keep moving.
Contact does not automatically mean something is wrong. In triathlon, some contact is normal.
Open Water Skill 5: Turning Around Buoys
Turns can get crowded during triathlon swims. Beginner athletes should practice turning around markers so race day feels less surprising.
In the pool, you can use objects on the deck as imaginary buoys. In open water, practice swimming around a buoy or landmark with a coach, group, or experienced swimmer.
The goal is to turn smoothly and then return to your rhythm.
Open Water Safety Rules
Open water swimming should always be approached with safety first.
Follow these rules:
Never swim alone.
Use a brightly coloured swim buoy.
Swim in approved areas.
Know the water temperature.
Start close to shore.
Practice with experienced swimmers, a group, or a coach.
Stop if you feel unsafe.
Learn the race rules before event day.
Give yourself time to adjust to cold water if needed.
Open water confidence is built gradually. Your first open water swim does not need to be long. It needs to be safe, calm, and controlled.
Understanding Triathlon Swim Starts
Different races use different types of swim starts. Knowing what to expect can reduce race-day anxiety.
Time Trial Start
In a time trial start, athletes enter the water one at a time or with small gaps between swimmers.
This is often beginner-friendly because there is more space and less contact.
Beginner tip:
Seed yourself honestly based on your swim ability. Starting too far forward can create unnecessary stress.
Rolling Start
In a rolling start, athletes enter the water continuously in small groups, often based on expected swim time.
This is common in many larger triathlons and is usually more manageable than a mass start.
Beginner tip:
Start with swimmers of similar ability, not where you wish you were.
Wave Start
In a wave start, groups begin together based on age group, gender, distance, or race category.
This can mean more swimmers around you at the beginning.
Beginner tip:
If you are nervous, start toward the side or back of the group so you have cleaner water and more space.
Mass Start
In a mass start, many athletes begin at the same time.
This is usually the most chaotic swim start. Contact is common and the first few minutes can feel intense.
Beginner tip:
Position yourself wide or toward the back if you are nervous. Your goal is a calm start, not winning the first 100m.
Deep Water Start
In a deep water start, athletes begin already in the water, often treading water before the race starts.
This can be tiring if you are tense or uncomfortable.
Beginner tip:
Practice floating and easy treading water before race day. Stay calm and conserve energy before the start.
Beach Start
In a beach start, athletes run from the beach into the water.
This can raise your heart rate before you even start swimming.
Beginner tip:
Stay controlled. Do not sprint into the water unless you are very confident. Enter smoothly, manage your breathing, and settle into your stroke.
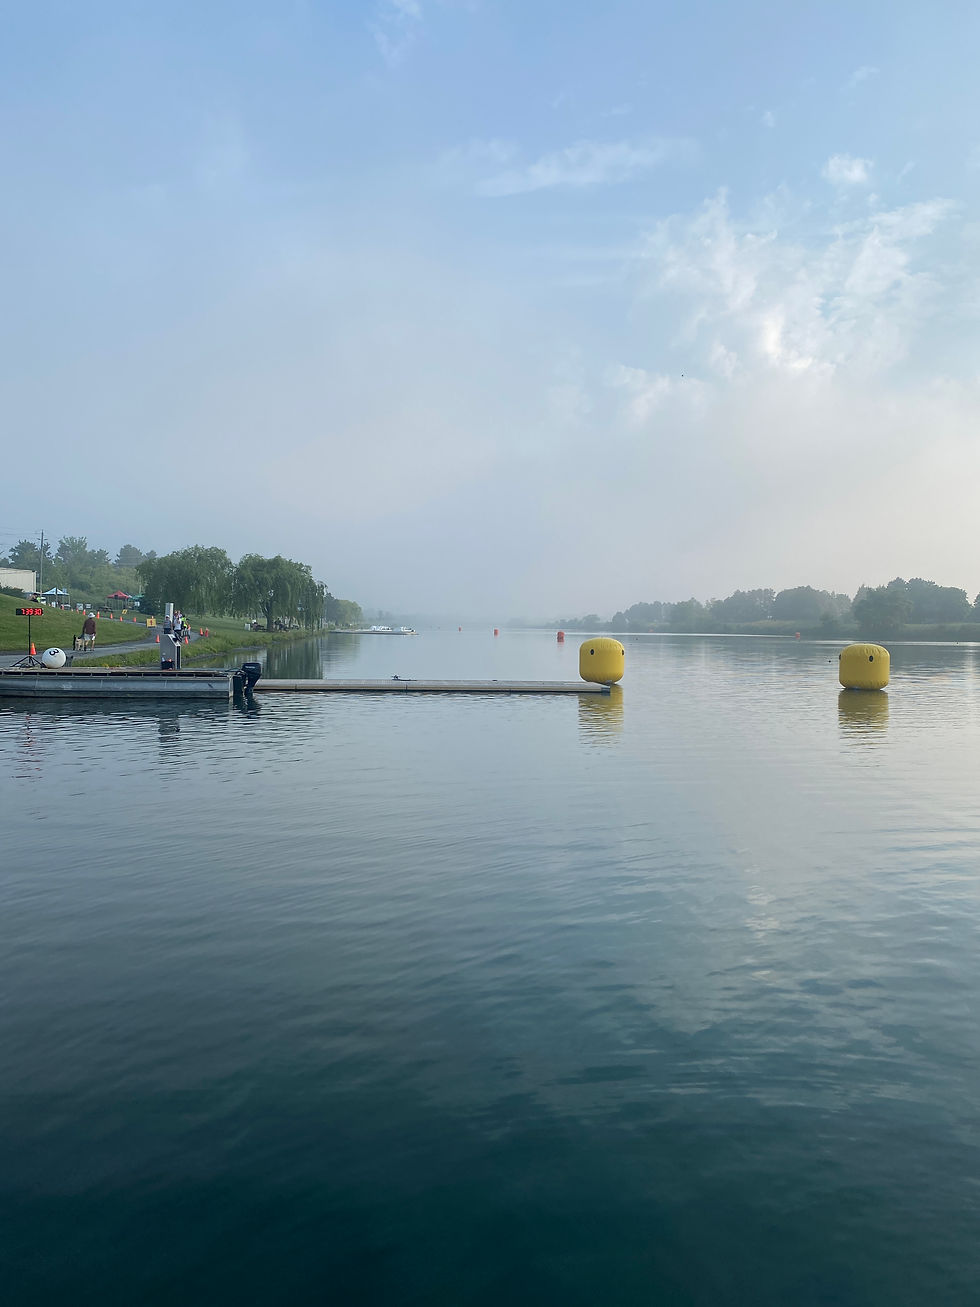
How Beginner Triathletes Should Choose Their Start Position
Your race does not need to be won in the first 100m, but it can become much harder there if you start too aggressively.
Beginner triathletes should choose a start position that allows them to stay calm, breathe well, and find rhythm. Starting slightly wide or toward the back is not a failure. It is often a smart race strategy that allows you to swim your own swim.
The first goal of the swim is simple:
Stay calm. Find water. Breathe. Settle in.
Once the early chaos spreads out, you can focus on your own rhythm.
Putting It All Together: Your Beginner Triathlon Swim Progression
Learning to swim better for triathlon is not about fixing everything at once. It is about building the stroke in the right order.
The progression should look like this:
Improve body position.
Add breathing control early.
Learn to catch, pull, and push water.
Relax the arm recovery.
Continue breathing drills throughout technique work.
Build swim endurance with short repeats.
Progress toward an 800m swim set.
Add simple speed changes once form is stable.
Practice open water skills.
Prepare for race-day swim starts.
Start with body position. Then improve how you catch and pull the water. From there, relax your recovery, control your breathing, and gradually build your swim endurance. Once the basics are stable, you can add short speed work and begin preparing for open water.
Step by step, single lengths become repeatable lengths. Repeatable lengths become longer sets. Eventually, an 800m swim becomes something you can approach with confidence instead of fear.
Need Some Help Getting Started?
Learning to swim better for triathlon is much easier when you have structure, guidance, and a plan that builds at the right pace. If you are ready to start putting these skills into practice, head over to TrainingPeaks and grab our Swim-Ready: Introduction to Swim Training training plan.
This plan is designed to help beginner triathlete swimmers build confidence, improve technique, and progress from short swim efforts toward more structured swim sessions. It is a great starting point if you are working on body position, breathing control, stroke mechanics, and building swim endurance one length at a time.
To make it even easier to get started, use the discount code below at checkout to get the plan for free:
Discount Code: SHELLSPLASH
Because every Shellmate deserves a smoother swim start.
Final Thoughts: Calm, Efficient, Confident
The beginner triathlon swim journey is not about becoming the fastest swimmer in the pool. It is about becoming calm, efficient, and confident enough to handle the swim and still have energy left for the bike and run.
If you can already swim front crawl, you have a starting point. Now the goal is to make that stroke smoother, more relaxed, and more repeatable.
Start with the basics. Respect the process. Build one length at a time.
Before you know it, those single lengths become 50s, those 50s become 100s, and that 800m swim set starts to look a lot less scary.
Slow is smooth. Smooth is strong. And strong gets the Shellmate to T1.
Ready to take the next step in your endurance journey?
Whether you’re chasing your first triathlon finish line, preparing for a Spartan race, or building toward a new personal best, our coaches at Rapid Snail Racing are here to guide you. Reach out today at coaches@rapidsnailracing.com to learn more about our personalized training services, our race-ready plans or our Beginner's Guide to Your First Triathlon.
Let’s turn your goals into results - Speed Optional. Swim Confidence Mandatory.


Comments